Most users might know that Integrating Sage Intacct with Scoro allows the user to sync all the bills and invoices along with the payments between the two platforms and to maintain a complete overview of the finances in both systems. Along with the automated data transfer, one can easily minimize the manual data entry and migration, this ensures the data quality and integrity.
What data can move between the systems?
Usually, the Data that navigates between Scoro and Sage Intacct can be divided into main data and background data.
The Main data
These are those items for which the user can toggle the sync on or off within the Sage Intacct integration page:
- Bills = “Accounts Payable → Bills” in Sage Intacct
- Invoices Invoices = “Accounts Receivable → Invoices” in Sage Intacct; Credit invoices = “Accounts Receivable → AR Adjustments” in Sage Intacct
- Receipts = “Payments” in Sage Intacct; applies for both Bills and Invoices
Now let us take a look at those Items that can be synced from Scoro to Sage Intacct along with bills and invoices. These include:
- Companies: Customers and Vendors in Sage Intacct
- Persons: Contacts in Sage Intacct
These are transferred over to Sage Intacct each time the user tries to sync a bill or an invoice.
- Person data is usually sent over only if the person previously exists as a contact within Sage Intacct. One will have to have synced the person with Sage Intacct manually beforehand, thus using the quick-actions option on the contact card. Otherwise, the contact field is usually left empty on the bill or invoice that reaches Sage Intacct.
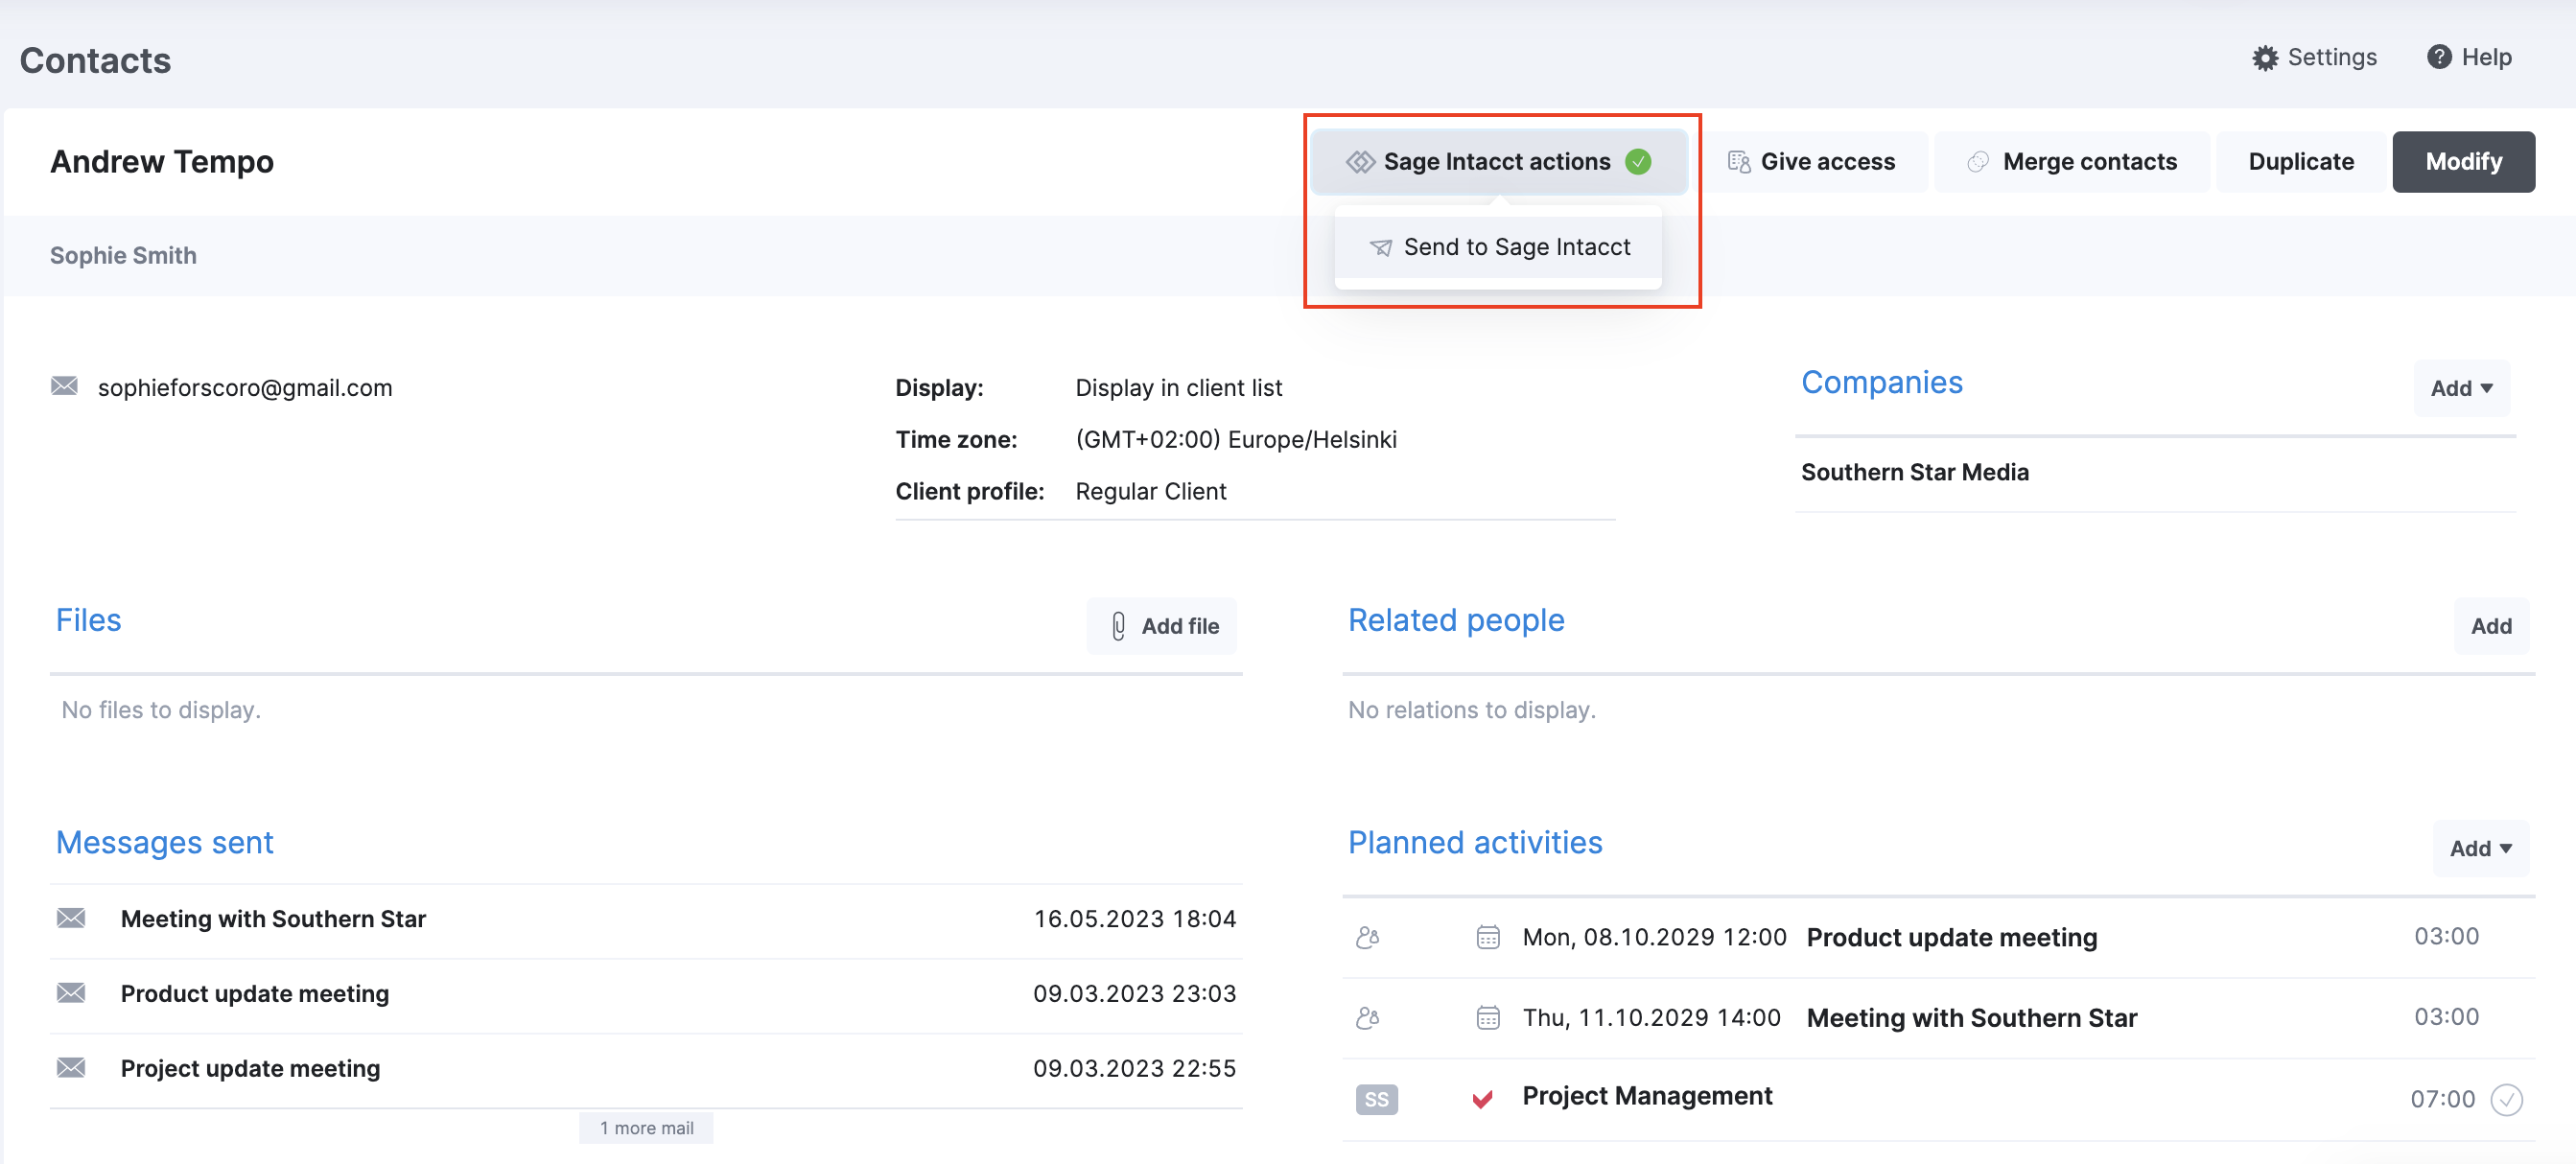
- The Company data is sent over every time: This implies that if you add a new company to an invoice, that company will be automatically created within the Sage Intacct as soon as the user sends the invoice.
Note that, unlike the other background items, the user can sync companies and persons manually, one by one and on their own, through the Sage Intacct quick-actions option located within the contact card. One can also match companies and persons with existing Sage Intacct customers, vendors, and contacts.
When does the main data move between the systems?
The user can customize data transfer settings within the integrations page under Settings > Site Settings > Integrations > Sage Intacct.
Note: The user should be aware that there is a request limit for your site, hence we advise you to optimize the sync frequency. The user can also sync the main data in five ways, according to your preference:
Option 1: Fully automatic sync – all the items that are toggled ON are synced automatically on a daily, weekly, or monthly, according to the Sync frequency that has been set.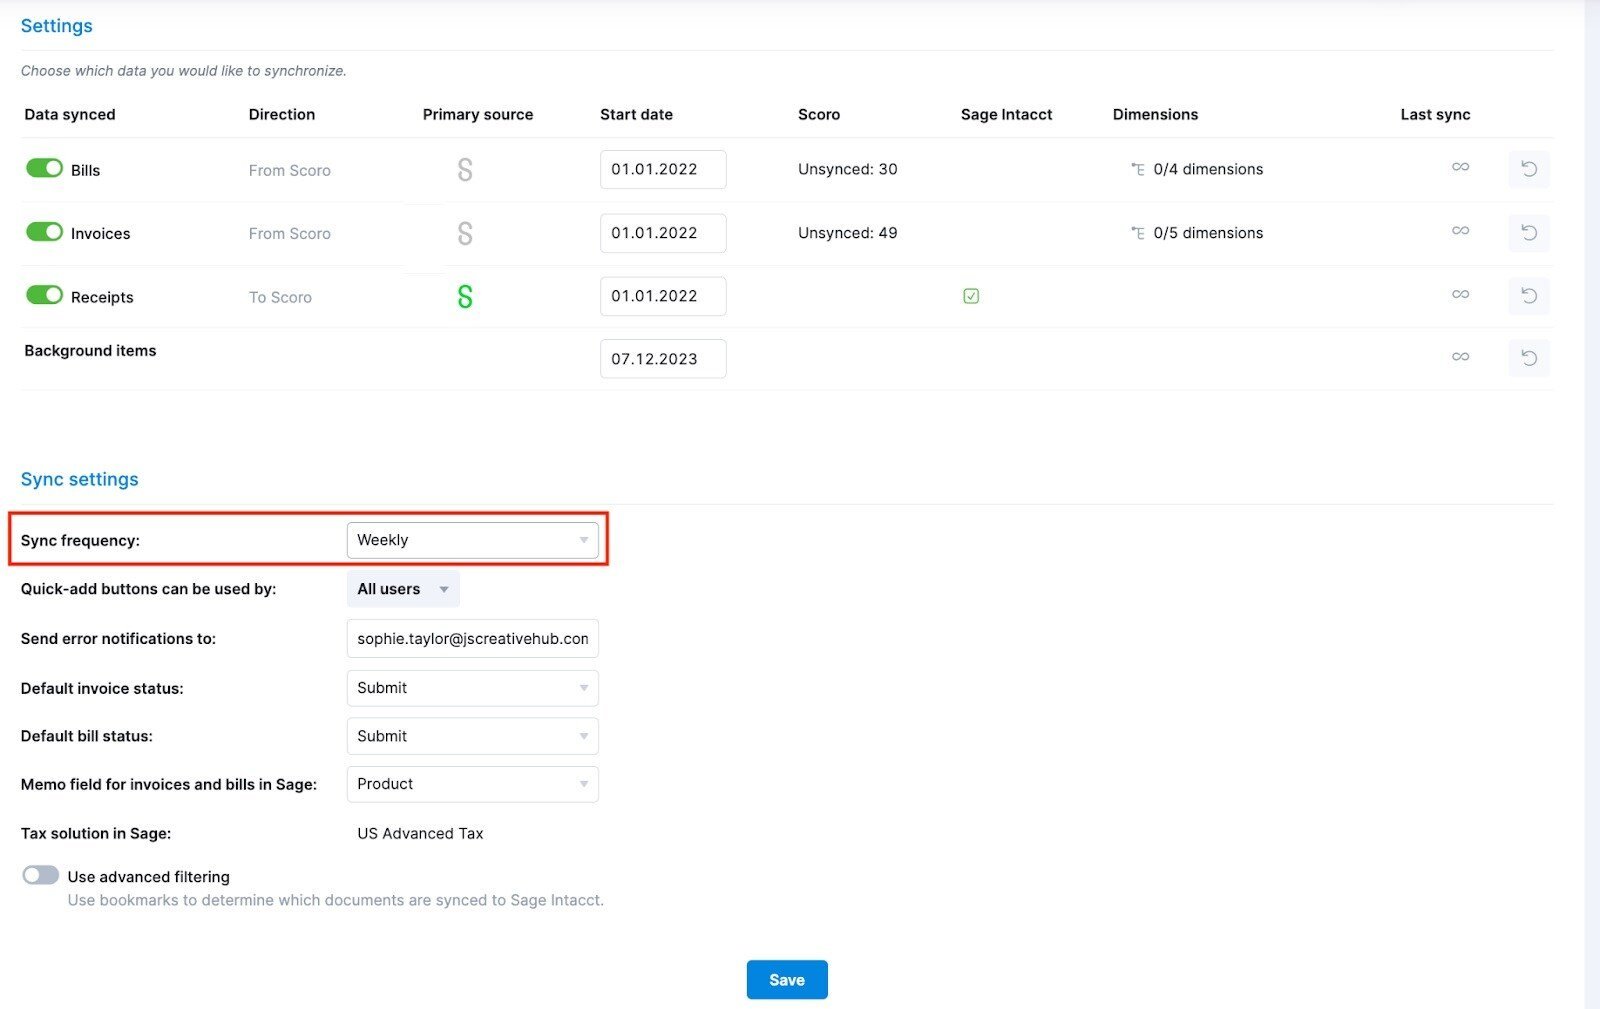
Option 2: Fully manual sync – In this case, the complete sync has to be initiated by the user through the Synchronize Now option located within the integration page. This will send all toggled unsent items over to Sage Intacct together. To use this option, set the Sync frequency to Manual.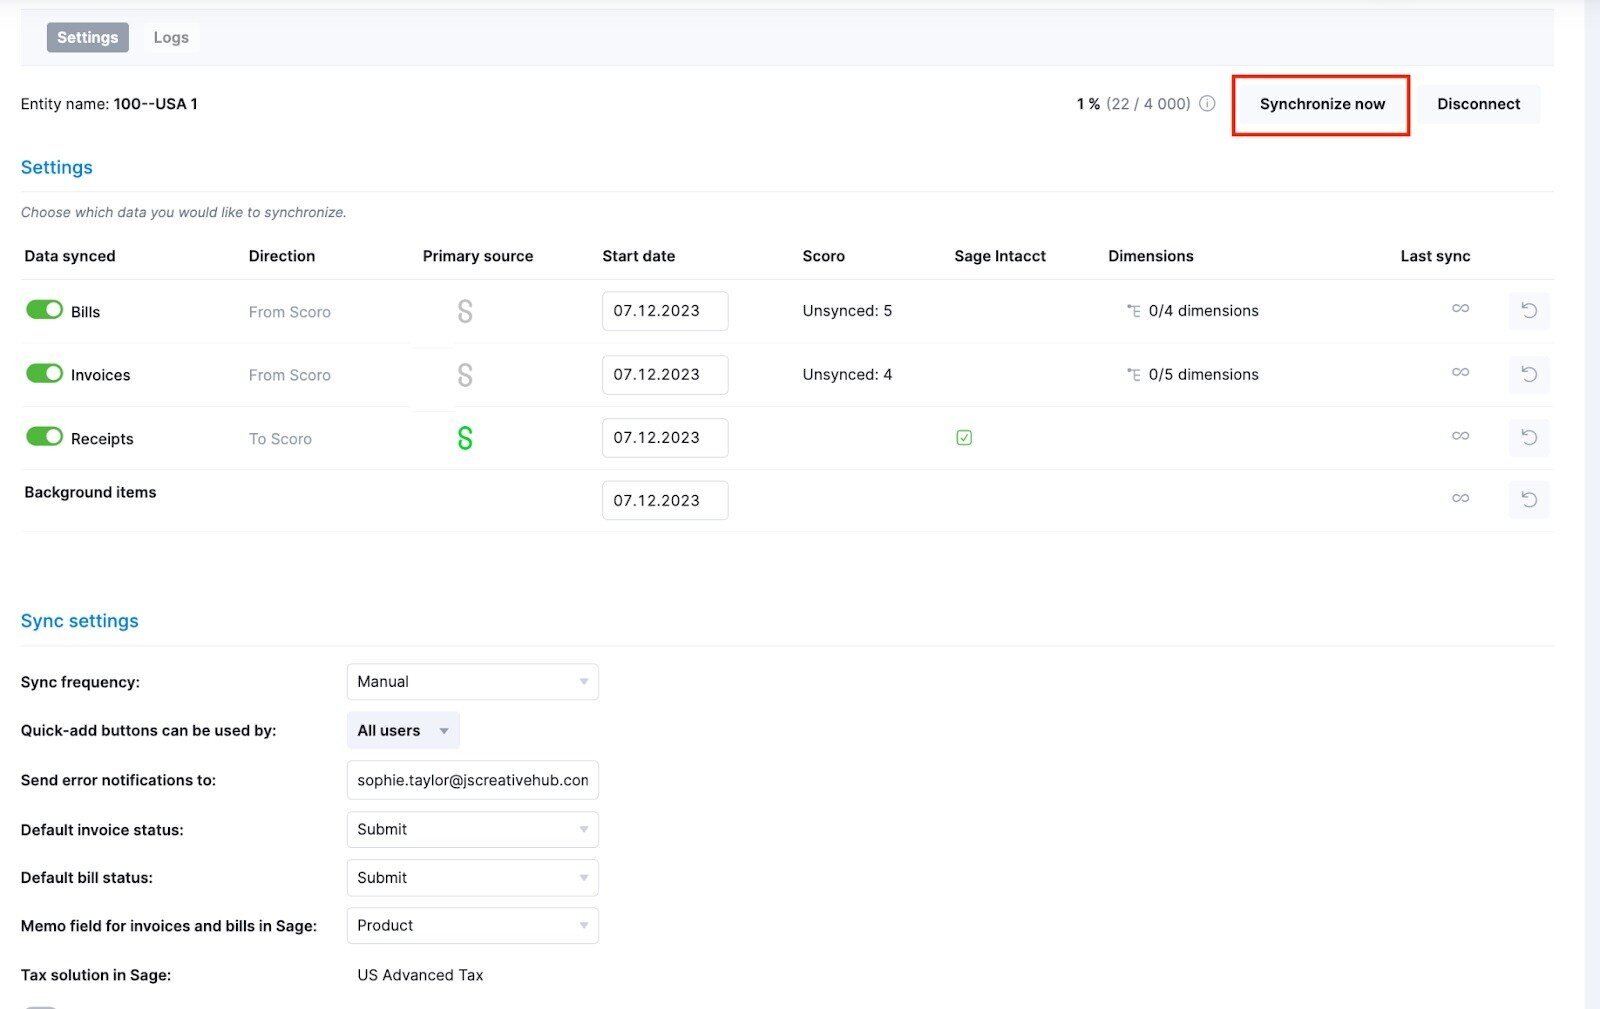
Option 3: Manual sync via quick actions –The items can be sent over individually through the quick actions option within the document view. To use this option, set the Sync frequency setting as Manual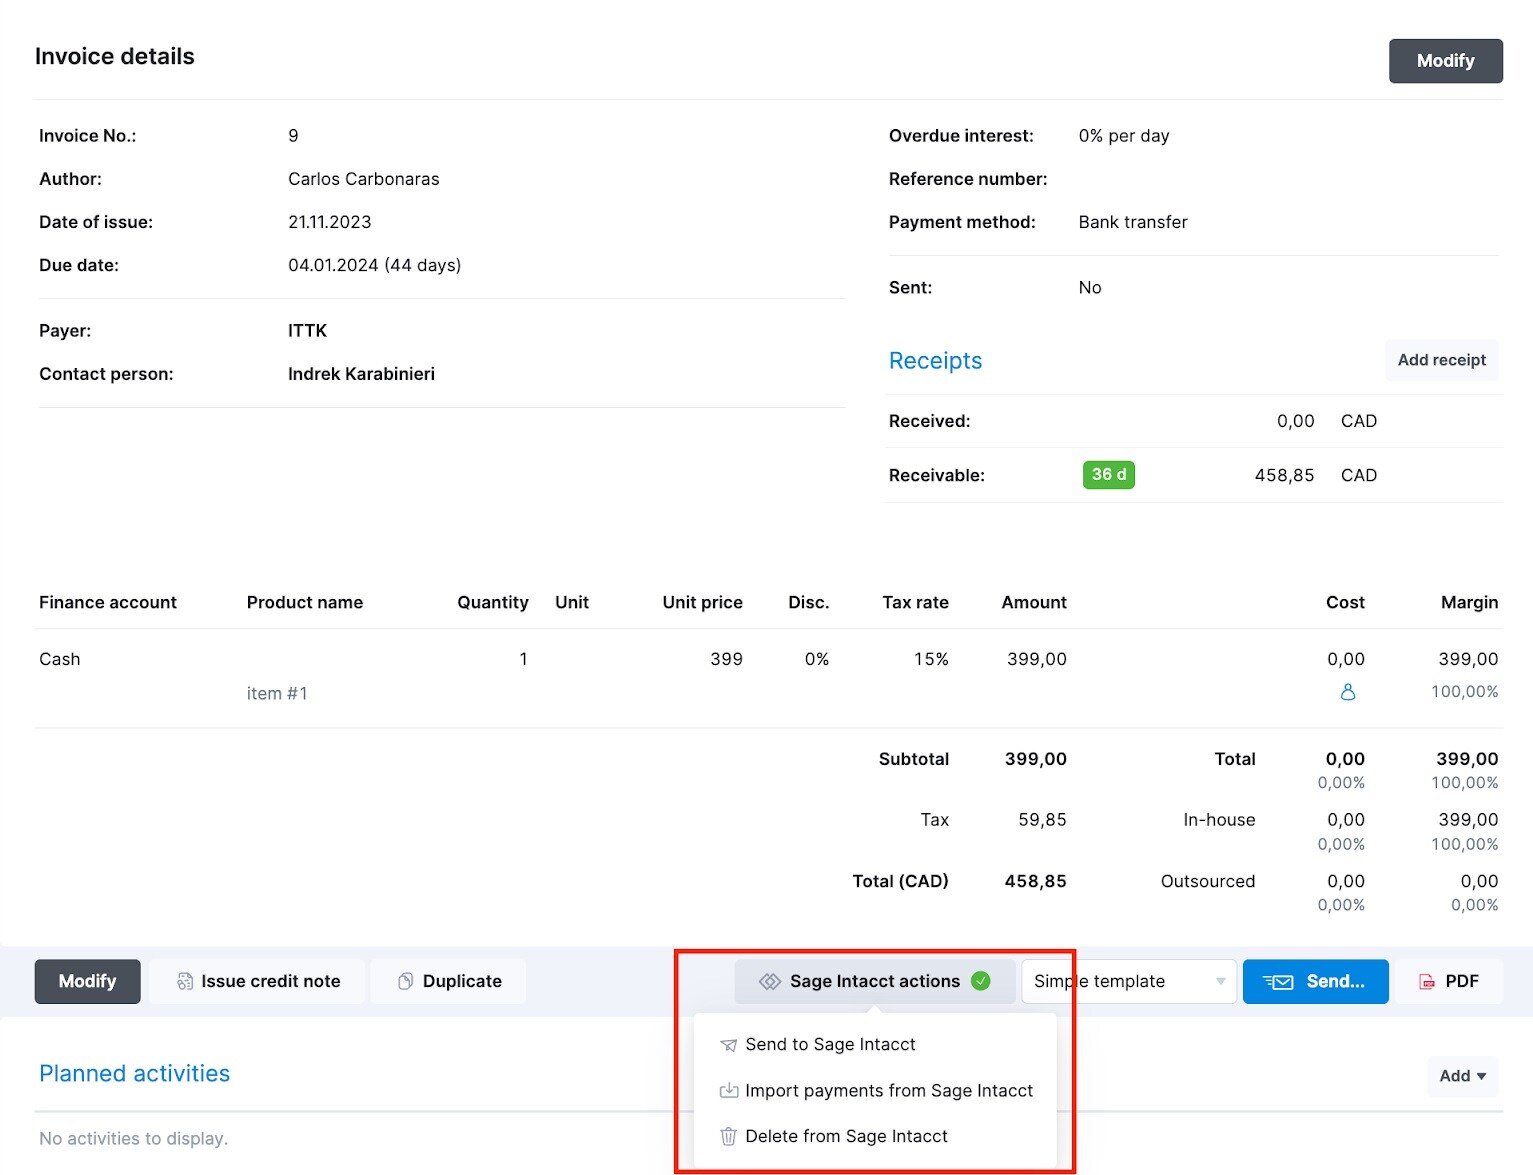
Option 4: Automatic + manual sync – One can have some items sent over automatically while syncing others manually. To use this option, you need to set the Sync frequency setting as Daily/weekly/monthly (= automatic) and toggle off the items that you wish to send over manually through the quick actions button. Take a look at the example screenshot below – according to these settings, bills, and receipts would be synced automatically every week. Invoices would only be sent over when you use the quick actions button in any document view.
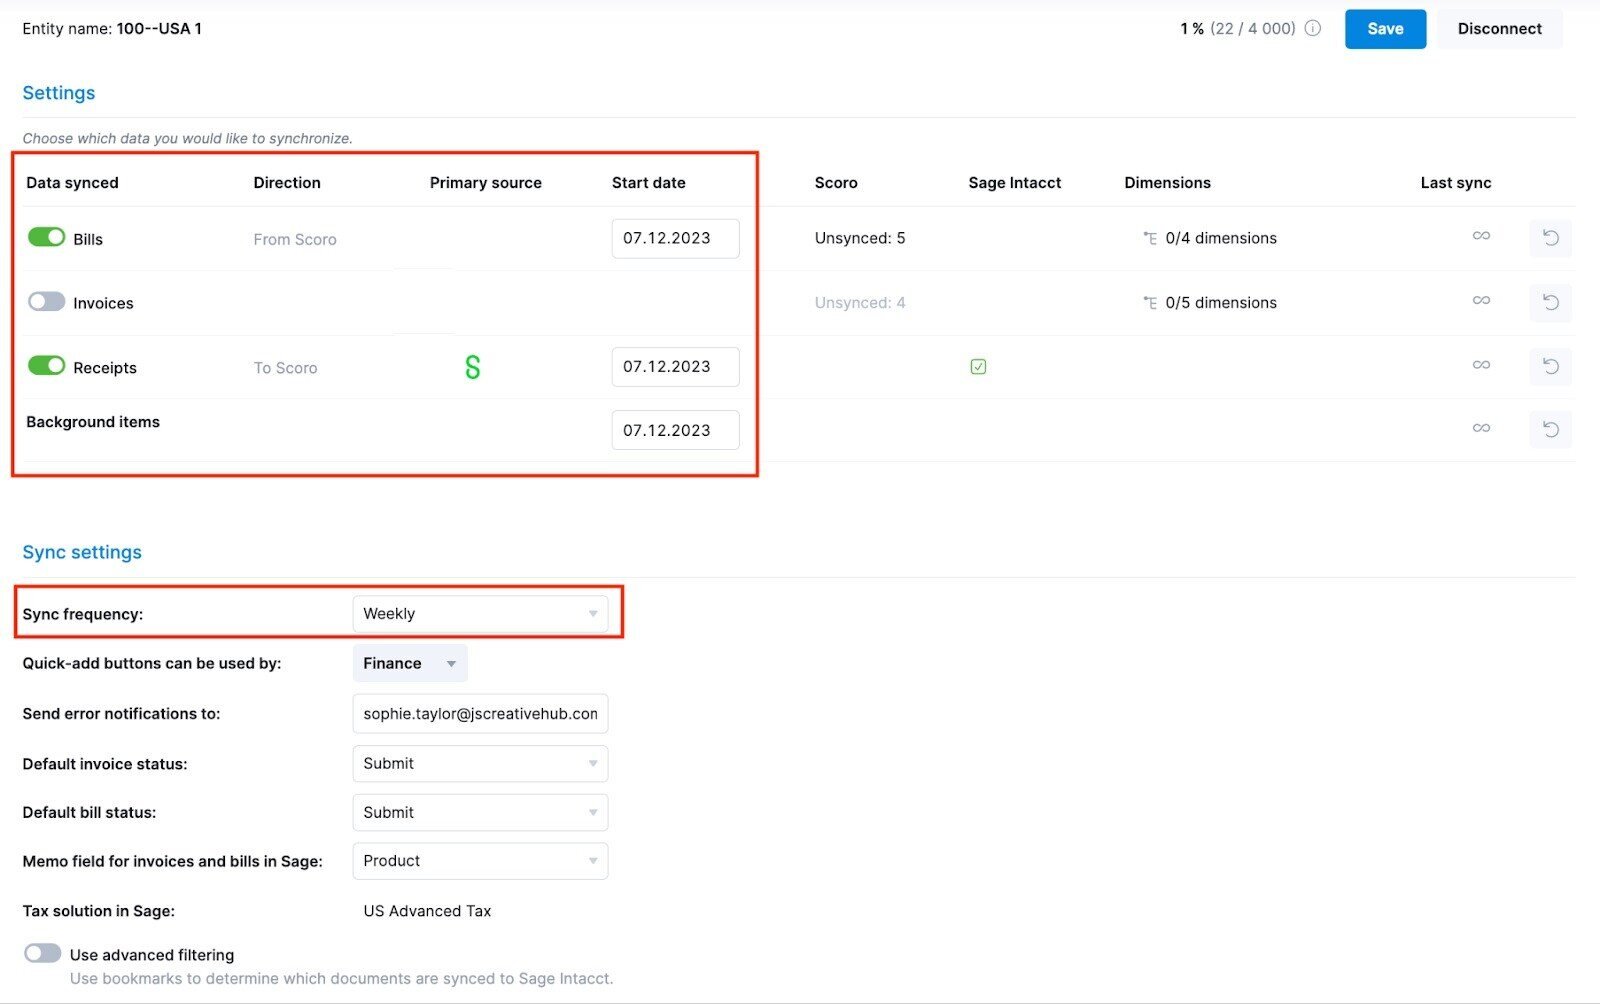
Option 5: Manual sync through the sync button – click on the sync option within the integration settings page in order to instantly send or pull data for the respective item group. One can combine this approach with any of the previous options.
Note that the sync direction for all items is predefined and can not be further modified.
Using the ON/OFF toggle, one can take control of which data one wishes to include in full automatic and full manual sync. In case you use only the quick actions option, all relevant document data will be automatically sent over to Sage Intacct every time
Related Topic -> Sage Intacct sync: Adding Chart of Accounts to Items used on bills or invoices
Why the issue of Sage Intacct sync: Transactions Aren’t Syncing after Initial Sync occurs
This problem mainly occurs when the BILL Sync Preferences are incomplete.
How to Fix the Problem
To resolve the problem, complete the Sync Preferences in BILL:
- With In the BILL, select Settings
- Within the Sync & Integrations, click select Preferences
- Now Verify that all required fields have been set
- Click Select Save
- Finally Sync again
Conclusion
How did you find the article? Was it helpful? This is all that we have at the moment on Sage Intacct sync: Transactions Aren’t Syncing after Initial Sync.
FAQs for Sage Intacct sync: Transactions Aren’t Syncing after Initial Sync
Q. What to do when an entity fails to sync from Sage Intacct that has related records?
A. In order to do this:
- Start by Copying the ‘Id’ of the Account/Contact/Invoice/Tax/TrackingCategory mentioned within the validation message
- Within the Sync Results Page ensure ‘linked’ has been selected within the filter at the top of the table
- Now Enter the ‘Id’ into the search bar filter and you should see the record along with a validation message
- Now Read the ‘Detail message’ and click on the ‘More info’ link in case you are not sure about your next steps
Q. Where can I see the Sage Intacct Sync From Date
A. The Sync From Date can be viewed through:
- Go to Settings
- Manage Add-ons and Integrations
- Within Sage Intacct, click View details.
